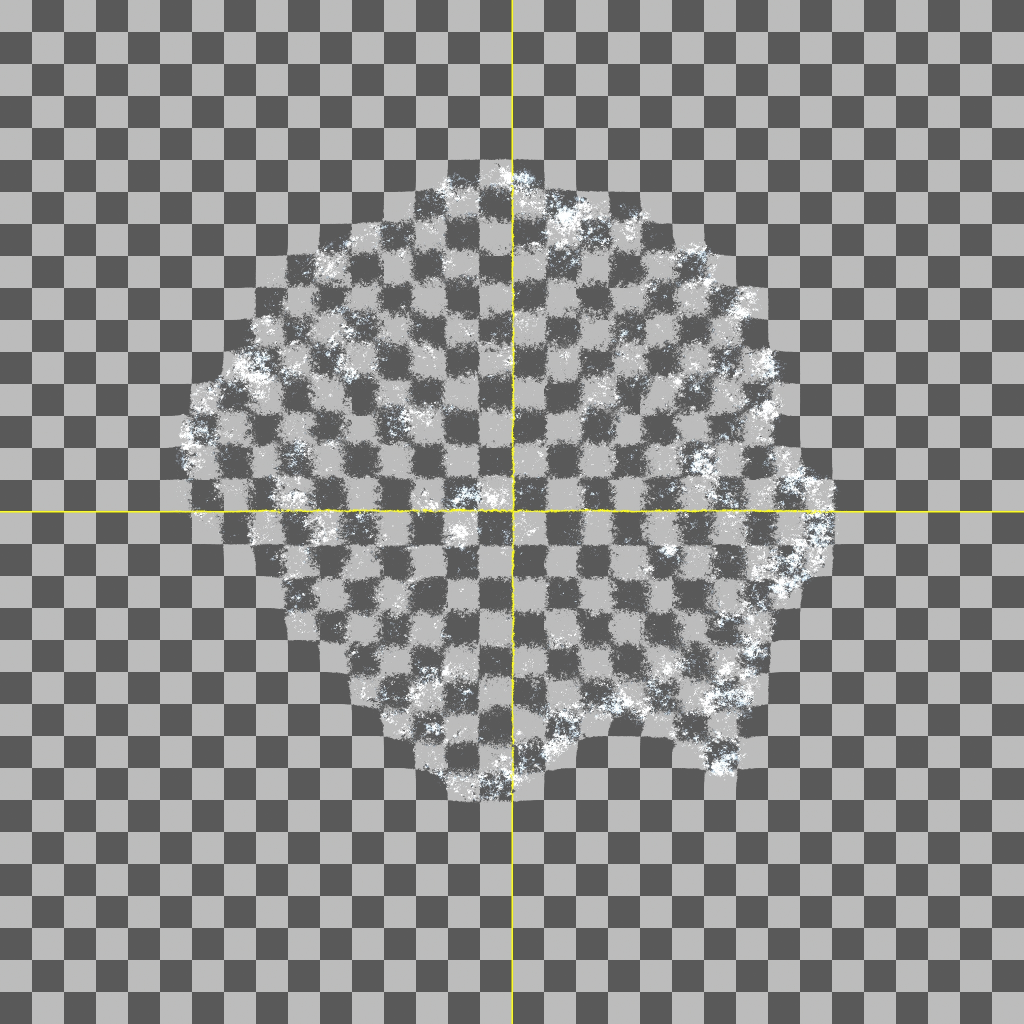
Compositors had always been asked to create some distortion animation, like revealing a transparent object on top of a background plate or building an actor comes out from a worm hole (stretch, compress the scene). When dealing these kind of effects as a style frame, it is not that complicated, we can combine spline warp and distort to achieve, but things always become more chaos while we have to animate the distortion itself and control the distortion area.
What I want to share here is how to use a UV map to build a radial distortion and which can control by certain shape. The approach is been used in this article is based on following great articles! If you have not read them, I highly recommend to go through them carefully!
Let us start with some basics discuss. A normal UV map, this should be quite familiar to compositors.
Standard UV map
We shuffle both Red and Green into forward U and V channel, result see below.
Distort directly
Not that useful, right? Every pixel just scale down towards the origin (let us say left bottom corner is origin for now). What if just shuffle the red channel, how distort node will behave.
Distort with Red channel
As using cursor to sample the value in the red channel, we can find a rule of distortion. Distort node will push each pixel from higher value towards to lower value.
Now we can move forward to next step of our discuss. As our goal is to make a radial distortion, radial ramp is a perfect pattern match what we request. For the detail explanation how to create a radial ramp in nuke you can make this radial red please check Nuke 101 expression.
Next, when we take a look about this red radial ramp, it only give us one variable which is not enough to define every direction. Even though it already push the check board as a radial distort, push the whole image to the left which we want to avoid.
If we treating this square_2k image as a 2D coordinate axis, and introduce the green value then the problem will be solved. The origin can be (1,1) or (0,0) which will affect your distort value go positive or negative.(1,1) is easy to build through the expression.
I used the same technique to build the green radial ramp, and also use expression ramp to divide the whole image into four portion. Then I used this ramp to negative value to multiply the radial uv map in order to get negative value for each portion.
Until now, it is quite close to the final radial uv map, we still need to add some blur overall, to get rid of the hash line in the middle, otherwise when we push the distort value extremely high will get some artifacts, or you can use iidistort node from Erwan Leroy’s nuke vector matrix. Last function I would to add is customize the center of the radial uv, to make it more practical. Again please check nuke 101 expression, you will get elaborate information about how to manipulate position in nuke.
Finally, our uv map and distortion result will look like below.
Based on this uv map, I built a frozen effect. I drew a simple rotoshape and combined with a noise map, and animated it through the timeline. Also, I added another layer of uv map with lumatovector(again another powerful tool from Erwan convert luminance to red green value to drive your distortion.)
This technique give us more freedom to build distortion effect, we can keep adding more details, like distortion intensity, edge glow, different patterns, etc. Meanwhile you don’t need worry about the actual distorting area. Let us think one step further, we can project this image on any 3D model to have three dimension distortion. P matte is another option it will give us the position information from 3D origin, distortion based on scene. Also, with P ref we even can build distortion on moving object or character.
